Crumpet’s Tri-Polish Challenge Day 4: Fan Brush Striped Nails
Here’s Day 4 of the Tri-Polish Challenge from Crumpet’s Nail Tarts, last day with this color set!
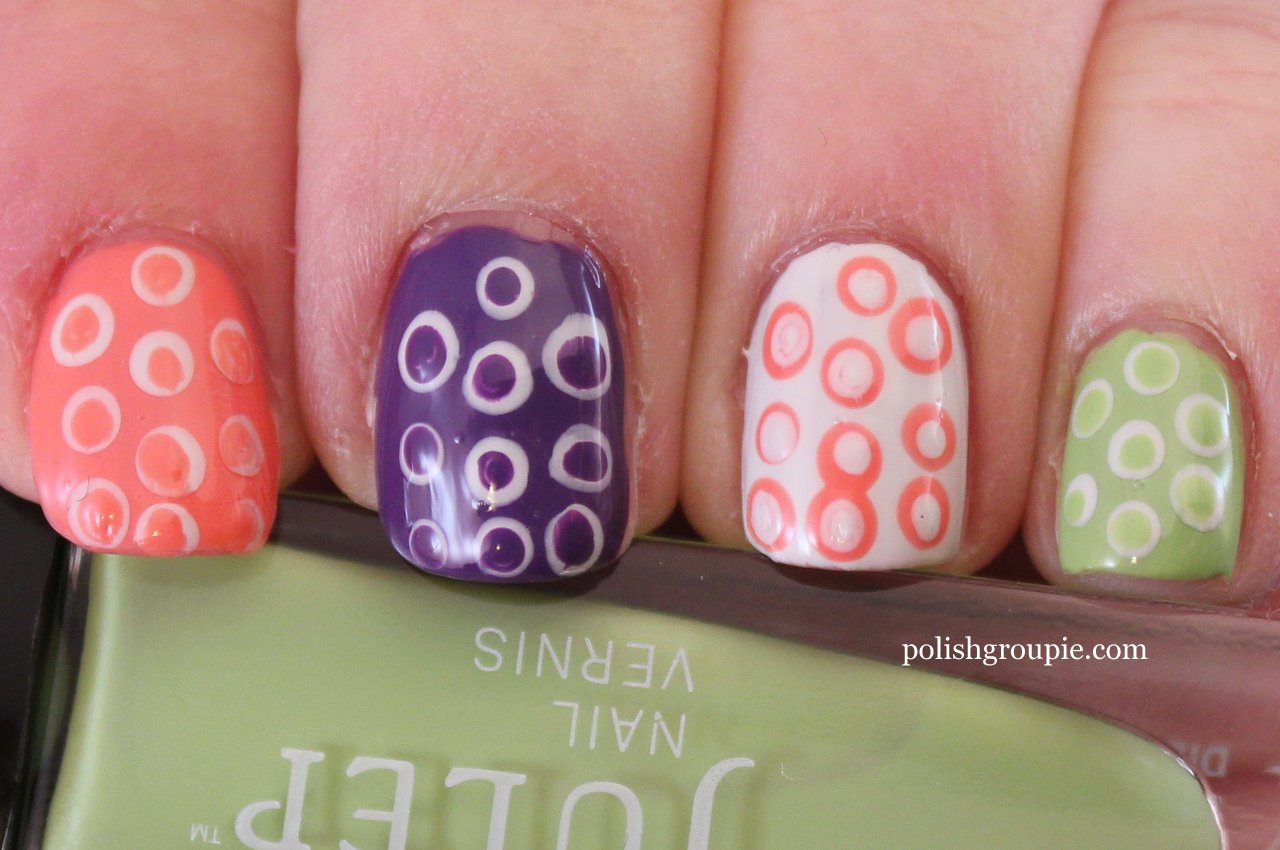
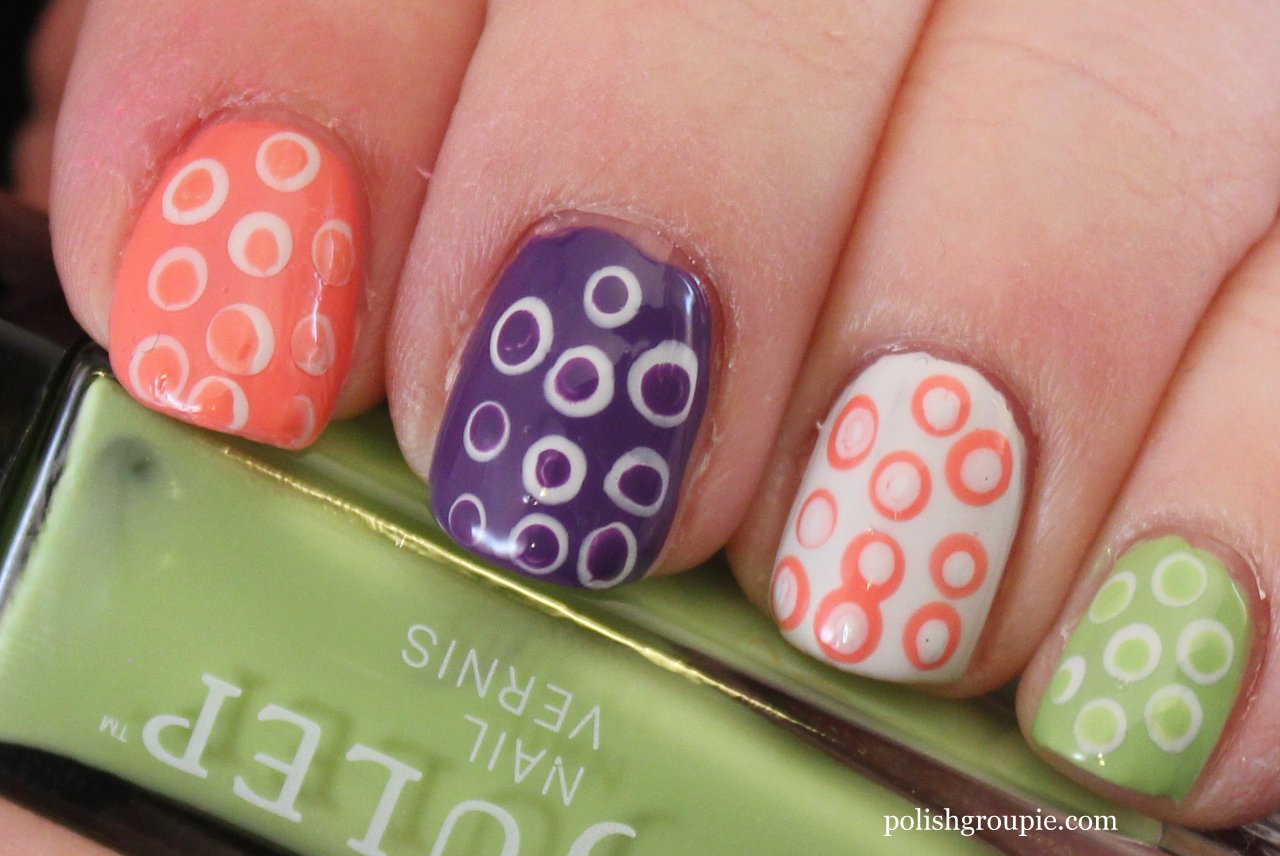
The basic rules are that you have to pick three polishes, one coral, one purple and one green, and then use those same polishes to create four different manis. You can also add in white, black, silver, gold and glitter toppers.
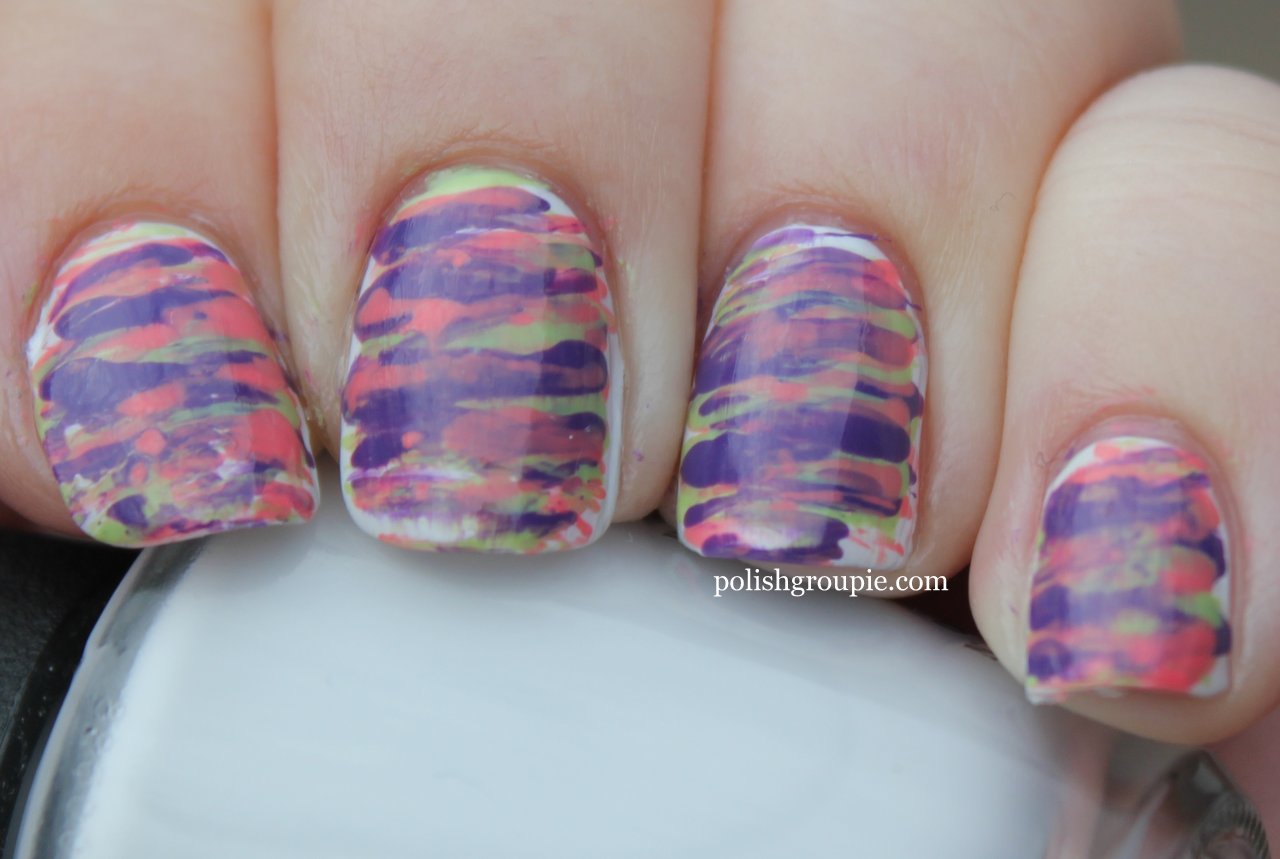
The three colors I chose are Sinful Colors Island Coral, Sinful Colors Amethyst and Julep Courteney; I used all three here for this fan brush striped nail art pattern. There’s a video tutorial here on fan brush striped nails from simplenailartdesigns if you’d like to see how to do it.
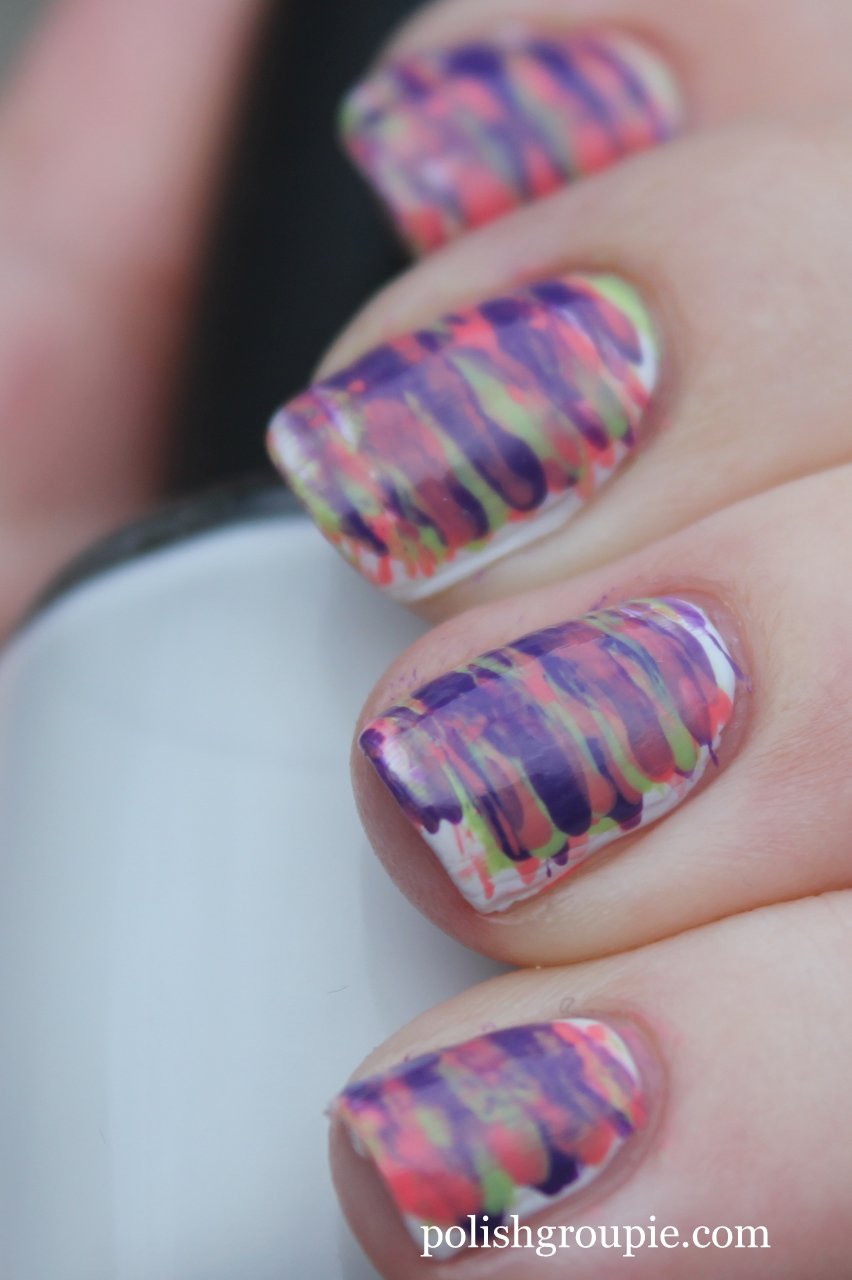
I started with two coats of OPI My Boyfriend Scales Walls for the white base, then dipped the tip of a fan brush into Sinful Colors Island Coral and spread it across the nail, first from one side toward the center, then from the other side toward the center. I followed that using the same technique to add stripes in Julep Courteney and then Sinful Colors Amethyst.

I repeated that color pattern several times to build up the layers, and then topped it off with one coat of Poshe fast-dry top coat.

I honestly wasn’t sure when to stop, and I can’t tell looking at the finished product whether I should have added more or already added too many (or if it’s good as is).

This was my first time using my fan brush, so will definitely try it again. I think I might like the design better with different colors.
Check out the rest of the challenge participants here: