A girl and her love of nail polish

Posts tagged ‘China Glaze’

12 Days Of Christmas Challenge: Snowmen

Day 4 of the 12 Days Of Christmas Challenge already? How did that happen? Today’s prompt is snowmen.

Christmas/Winter nail art: Snowmen

A few days ago I featured Rescue Beauty Lounge Piu Mosso on the blog. I used that same mani as the base for this one, so there is a little bit of wear. This is two coats of Piu Mosso plus one coat of Poshe fast-dry top coat to start, and then I added one coat of China Glaze Fairy Dust. The Piu Mosso made it look to me like a night scene, so I thought the China Glaze Fairy Dust would almost look like stars or maybe snow.

Christmas/Winter nail art: Snowmen

I then used a large dotting tool to add the snow across the bottom of each nail with OPI My Boyfriend Scales Walls. I used the same color to do the first layer of dots for all of the snowmen. I then added a second dot to each that was just slightly smaller than the original using NYC French White Tip. My working theory was that since the OPI is a white with a gray tinge that it would provide a little shading compared to the stark white NYC color. Not sure that came through in the finished product, but that was the idea.

Christmas/Winter nail art: Snowmen

I used a small dotting tool to create the scarves with Essie Very Cranberry, and then used Orly Liquid Vinyl for the coal buttons and eyes.

I finished it off with one coat of Poshe.

Christmas/Winter nail art: Snowmen12 Days Of Christmas Nail Art Challenge


12 Days Of Christmas Challenge: Candy Cane French Tips

Day 3 of the 12 Days Of Christmas Nail Art Challenge sponsored by Pink & Polished Nails and Over Polished brings us to candy canes.

Candy Cane French Tips

For mine I did candy cane french tips. I started with one coat of clear base coat and then one coat of China Glaze Fairy Dust to the whole nail.

Candy Cane French Tips

Then I taped off my tips and applied two coats of OPI My Boyfriend Scales Walls, followed by one coat of Poshe fast-dry top coat. When that was dry, I re-taped my tips and added stripes. I applied the red, Ulta Steppin Out, with a small nail art brush. The green is an It’s So Easy Stripe Rite striper polish.

Candy Cane French TipsCandy Cane French Tips

I finished with one coat of Poshe.

12 Days Of Christmas Nail Art Challenge

Please visit some of the other bloggers participating in the 12 Days Of Christmas Nail Art Challenge:


Nail-aween Nail Art Challenge: Spider Nail Art

Today’s theme for Day 7 of the Nail-aween Nail Art Challenge from datyorkLOVES/SassyNails is spiders.There are 10 themes for the challenge, and I have to complete all of them by the end of October, but other than that, it’s self-paced.

Spider Halloween Nail Art

I found this super-cute spiderweb funky french manicure from Kayla Shevonne that I liked a lot, but since I just did Frankenstein french tips for yesterday’s prompt, I switched it up a bit for this one by doing a gradient instead.

Spider Halloween Nail Art

I started with three coats of Sinful Colors Lets Meet, which is pretty much a shimmery Tweety Bird yellow. I followed that with one coat of Poshe fast-dry top coat.

Spider Halloween Nail Art

Then I applied Sinful Colors Lets Meet and China Glaze Riveting (beautiful shimmery orange) directly to a makeup sponge and dabbed that on my nails. I did it at least twice on each nail to get the orange as dark as I wanted. I followed that with one coat of Poshe.

Spider Halloween Nail Art

For the spiderweb and spider legs, I drew on my nail using a Kiss Nail Artist pen. The spider body is a large dot of Orly Liquid Vinyl. The eyes are smaller dots of NYC French White Tip and Orly Liquid Vinyl again. Topped that nail off with one final coat of Poshe.
Nail-aween Halloween Nail Art Challenge


Check out all of the NailAween Nail Art Artists!

Nail-aween Nail Art Challenge: Matte Dotticure

So this is my Day 2 post for the Nail-aween Nail Art Challenge from datyorkLOVES/Sassy Nails. There are 10 themes, and I have to complete all of them by the end of October, but other than that, it’s self-paced.

Today’s theme is a matte dotticure. I was really happy with the way this one came out, and it was really fun to wear.

Halloween Dotticure Dotting Nail Art with China Glaze Riveting

Halloween Dotticure Dotting Nail Art with China Glaze Riveting

I started with two coats of Orly Liquid Vinyl on all of my nails except my ring finger, which is two coats of China Glaze Riveting.

I added one coat of Poshe quick-dry top coat. As I did, some of the China Glaze Riveting transferred to the brush and then to my nail as I was painting the next black nail, and it left behind a bit of the orange shimmer. I really loved the way it looked, so I decided to do some minor frankening: I mixed a bit of the two colors together on some wax paper and then painted that on top of the black nails so they’d all have a bit of the orange shimmer on them. Topped all of that off with Poshe when I was finished.

Halloween Dotticure Dotting Nail Art with China Glaze Riveting

Then I added dots. I started with Ulta Snow White dots using the head of a pin, then used a small dotting tool for the inner dots: black on the orange nail, orange on the black nails. The accent nail almost looks like a bunch of googly eyes, don’t you think?

Halloween Dotticure Dotting Nail Art with China Glaze Riveting

To make it matte, I added one coat of Essie Matte About You. Unfortunately I didn’t let it dry long enough before I applied it, and it smeared some of the dots. 😦 The matte effect wasn’t very strong, perhaps I needed to add more.

Halloween Dotticure Dotting Nail Art with China Glaze Riveting

Here’s a look at the manicure before I added the matte top coat.

Halloween Dotticure Dotting Nail Art with China Glaze Riveting

Halloween Dotticure Dotting Nail Art with China Glaze Riveting

Halloween Dotticure Dotting Nail Art with China Glaze Riveting

Nail-aween Halloween Nail Art Challenge

Check out all of the NailAween Nail Art Artists!

30 Day Challenge Day 29 – Supernatural: Vampire Nail Art

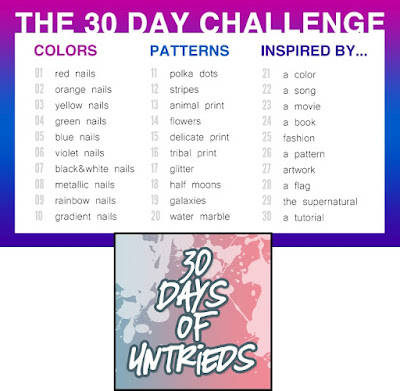
Coming in under the wire here on Day 29 of the 30 Day Challenge because it took me all day to figure out exactly how I wanted to portray the theme of vampires for my inspired by the supernatural manicure.

Vampire Nail Art

I’m a big fan of most things vampire these days: Buffy The Vampire Slayer, True Blood, Twilight, Being Human, Anne Rice novels, etc., etc..

I finally found this manicure based on the Buffy The Vampire Slayer TV series, so I used that as the basis and then tweaked it a bit to be more generally vampire themed rather than specifically Buffy.

The thumb represents fire. The index finger represents dripping blood, ever-present in most vampire lore. The middle finger is a cross necklace. The ring finger is a stake through a heart and the pinkie is a vampire bite. So representing both sides with this one: the vampires and the weapons that can take them down.

Vampire Nail Art

Here are the polishes I used:
thumb: two coats of Color Club Catwalk Queen, Sinful Colors Lets Meet, Kiko 359, China Glaze Riveting, Ulta Steppin Out

Vampire Nail Art Fire

index: two coats of Ulta Snow White, Ulta Steppin Out

middle: three coats Orly Royal Velvet (untried for 30 Days of Untried), Kiss Silver striper polish

Vampire Nail Art Dripping Blood, Cross/Crucifix

ring: two coats of Orly Liquid Vinyl, Essie Very Cranberry, Kiss Silver striper polish

pinkie: two coats of Ulta Snow White, Orly Liquid Vinyl, Ulta Steppin Out

Vampire Nail Art Stake Through The Heart, Vampire Bite

30-Day Challenge, 30 Days of Untrieds

Please visit some of the other bloggers that are participating in the 30 Day Challenge this month. I know we will need a lot of encouragement to get through! Click here to see them:


30 Day Challenge Day 27 – Artwork: Mark Rothko Nail Art

I had to enlist my sister for help with this one because she works in the fine art field. I needed recommendations on artists to look at for Day 27 of the 30 Day Challenge, inspired by artwork. She pointed me toward Mark Rothko, an abstract artist whose nearly 50 year career started in New York in the early 1920s.

Mark Rothko paintingsMark Rothko paintings

Mark Rothko Nail Art

I modeled each nail after a different one of his paintings.

Pinkie: I started with two coats of Sinful Colors Let’s Meet. The orange block is China Glaze Riveting and the white block is NYC French White Tip

Ring: The base is two coats of Sinful Colors Slate. The violet block is A-England Elaine and the white block is NYC French White Tip.

Mark Rothko Nail Art

Middle: The base is one coat of Essie Very Cranberry. The middle block is Sally Hansen Wine Not, the bottom block is Kiko 359 with a little Wine Not mixed in, and the top block is Megan Miller Lemon Ice, my untried for the 30 Days of Untrieds challenge I’m doing simultaneously.

Index: I started with two coats of Sinful Colors Cinderella. The top and bottom blocks are an unnamed shimmery turquoise shade from Paris Nail Lacquers (also untried). The middle stripe is the same color mixed with a little Wet n Wild I Need A Refresh-Mint

Mark Rothko Nail Art

Thumb: One thick coat of Orly Liquid Vinyl. The stripe is Sinful Colors Ruby Ruby mixed with China Glaze Riveting.

Mark Rothko Nail Art

Hope you like it!


30-Day Challenge, 30 Days of Untrieds

Please visit some of the other bloggers that are participating in the 30 Day Challenge this month.
I know we will need a lot of encouragement to get through! Click here to see them:


30 Day Challenge Day 10 – Gradient: Cult Nails Untamed with Zoya Lotus

It’s day 10 of the 30 Day Challenge, which means I’ve survived one-third of it. Woo hoo for me. Today’s theme is gradients.

Since I haven’t done this kind of gradient before, I tried to keep it simple. For the gradient, I used two colors, Zoya Lotus and Cult Nails Untamed. The latter satisfied the 30 Days of Untrieds challenge I’m doing simultaneously with this one. I also added China Glaze Luxe And Lush, a layering polish with holographic flakies, to make it a little more interesting.

Gradient manicure: Cult Nails Untamed with Zoya Lotus and China Glaze Luxe And Lush

I started with two coats of Cult Nails Untamed as the base, then a coat of Poshe fast dry top coat. I let it dry completely before starting the gradient. Untamed is a medium pink sheer-ish polish with a fine shimmer. Zoya Lotus is an amethyst purple with a stronger pink/gold shimmer (click to see it on it’s own).

Gradient manicure: Cult Nails Untamed with Zoya Lotus and China Glaze Luxe And Lush

I know there are several different techniques for doing gradients; I used a makeup sponge and brushed the polish directly onto it, then dabbed it onto my nail. I dampened the sponge a little with water before I started so it wouldn’t absorb quite as much polish … not sure if it made a difference or not. I put the darker color on first and then the lighter one, making sure they overlapped some in the middle. As I dabbed the sponge on my nail, I moved it back and forth a little, tip to base, to make sure I got Zoya Lotus where I wanted it, and also to help with the blend a bit.

Gradient manicure: Cult Nails Untamed with Zoya Lotus and China Glaze Luxe And Lush

I added another layer of Poshe, then one coat of China Glaze Luxe And Lush, followed by one coat of Gelous since the flakies are chunky in the CG, and finally another coat of Poshe.

Gradient manicure: Cult Nails Untamed with Zoya Lotus and China Glaze Luxe And Lush

I wasn’t able to achieve as much of the blend in the middle as I wanted, so perhaps this technique wasn’t the best for that. It also might have been my polish choices: the Cult Nails Untamed was sheer and light in color, so it didn’t blend into the Zoya as much is get absorbed into it.

Still, I’m glad to have my first sponge gradient under my belt. Any tips you can share would be greatly appreciated.

30-Day Challenge, 30 Days of Untrieds

Please visit some of the other bloggers that are participating in the 30 Day Challenge this month. I know we will need a lot of encouragement to get through! Click here to see them:


Tag Cloud